Week 7
Making Models
Change of Scale:
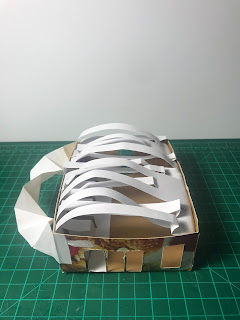
As suggested by the brief for this week, I tried to make my model to a different scale other than 1:50, so I tried making a 1:20 model of the same room on paper. The photo above shows the assembly of the model which I could not fold the model from a single sheet of paper as the scale was too big so I resorted to making seperate walls with tabs instead.
Thoughts on the new scale:
I honestly did not like the 1:20 scale as it was too big for my comfort to work with because there was so much space it was hard to fill with folding technics. It was a nice experiment to see my living room at a new scale but my brain couldn't work creatively with so much space to fill, so for the next couple models, I will be working to my comfort zone scale of 1:50. I might come back to using 1:20 if it is to focus on one room instead of the whole big living area.
Lighting Activity
11/04/2020 - The 3 images below show my attempt of trying to capture the new model with natural lighting, however I did not set up the area of photography properly as guided by the 'How to take Photos of your Models at home', so I will need to retake them and upload it as an edit to this blog. I also forgot about the scale humans that need to be photographed within the model to show scale so I will be adding that to the edited upload of this blog as well.
20/04/2020 - Lighting Activity UPDATED
This time I took better photos of the 1:20 model WITH the human for scale this time, the human is my height of 150cm which is 7.5cm scaled.
Further Modelling at 1:50


After making the 1:20 model and not being satisfied with it, I made an iterated version of it with an added geometric roof instead of the arched cut rood, as well as adding more windows to allow for more natural lighting and ventilation at a scale of 1:50.
This iterated design connects the inside to the outside word through the clear windows.
The first two images are of the 1:50 model freshly made, with the exposed cereal box labels.
The third image shown here in all white is the same model spray painted white to try and conceal the cereal box interior.
Below are photos of the roof I folded through experimenting the different folding technics and going through my origami book for inspiration.
Fusion 360: 3D Shapes

|
Pictured above is the shape of my 3D shape before being hollowed out. I personally did not find any troubles in using Fusion 360 to model this and found it quite easy as I have used this program before during high school, and Russel's tutorial video was easy to follow for this activity
|
My initials were very simple which made this modelling activity not as hard to model or as tedious to put together in comparison to Week 5's model.
Fusion Model UPDATED:
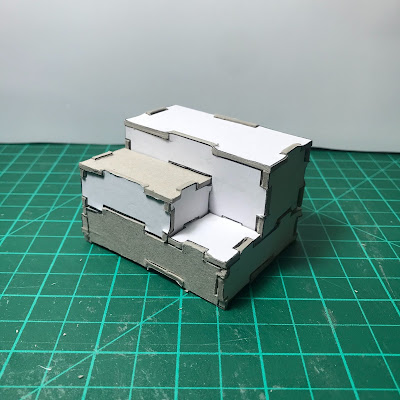
After looking back on my 3D initials model on Fusion, I felt like I could improve the model a bit better and add more interest to it by making the two Ts different, adding a curve to one end and making the sides uneven to curate an interesting space after it has been lofted and hollowed out. Updates results shown below:


